
Azure Active Directory B2C (business-to-consumer) is a version of the Azure Active Directory that allows users (consumers) to register with the application.
This article shows how to create an ASP.NET Core application to use this great Azure service.

Creating an ASP.NET Core Web Application
First, let’s create an ASP.NET Core Web application. Using .NET CLI with the ASP.NET Core Web App template, the --auth option gives some different predefined options to authenticate and authorize users:
- Individual
- IndividualB2C
- SingleOrg
- MultiOrg
- Windows
Using Individual, a local database is created that’s used to store user information. This is quite powerful option to store users and roles, users can register with the application, and you can configure email providers to verify the email from users. You can also completly customize what information about users is stored. The dialogs for user input are specified with a Razor pages library, with scaffolding you can override these dialogs. However, if there’s not a really good reason to create a database to store user information, it’s best to use a service that’s independent of the web application – such as Azure Active Directory.
IndividualB2C is the option covered in this article – accessing Azure Active Directory B2C. With this information, you can also easily make use of the next two options, accessing an Azure Active Directory (AAD) with a single organization (SingleOrg) or multiple organizations (MultiOrg).
Using the option Windows, the authorization part is outside of the application. With Windows authentication, you typically make use of an on-premises Active Directory (or use a hybrid version with synchronization options using AAD), and have your application hosted with Internet Information Server (IIS). Here the authorization can be done from IIS.
Let’s create a new web application with the IndividualB2C option. Using the .NET CLI, you can also specify values for all the different options needed to access the directory (e.g. using --aad-instance, --client-id, --reset-password-policy-id, and many more), but it’s not hard to change the values afterwards.
dotnet new webapp --auth IndividualB2C -o AADB2CSample
The generated project has these NuGet packages added:
- Microsoft.AspNetCore.Authentication.JwtBearer – enables the application to receive an OpenID Connect bearer token
- Microsoft.AspNetCore.Authentication.OpenIdConnect – this is a package for middleware to support the OpenID Connect authentication flow
- Microsoft.Identity.Web – this package is for the web applications using the Microsoft identity platform and itself has dependencies on some Microsoft identity libraries, e.g. Microsoft.Identity.Client
- Microsoft.Identity.Web.UI – this package contains an
AccountControllerand Razor pages
Using .NET 6, with the generated top-level statements, the DI container is configured (see the following figure). The method AddAuthentication configures the OpenIdConnect authentication scheme. AddMicrosoftIdentityWebApp defines the identity service to be used. For this configuration, the values using the section AzureAdB2C are retrieved as shown in the following image.

The configuration specified can be found in the file appsettings.json as shown in the next figure. Here you must set the values which you can find in the Azure ADB2C configuration.
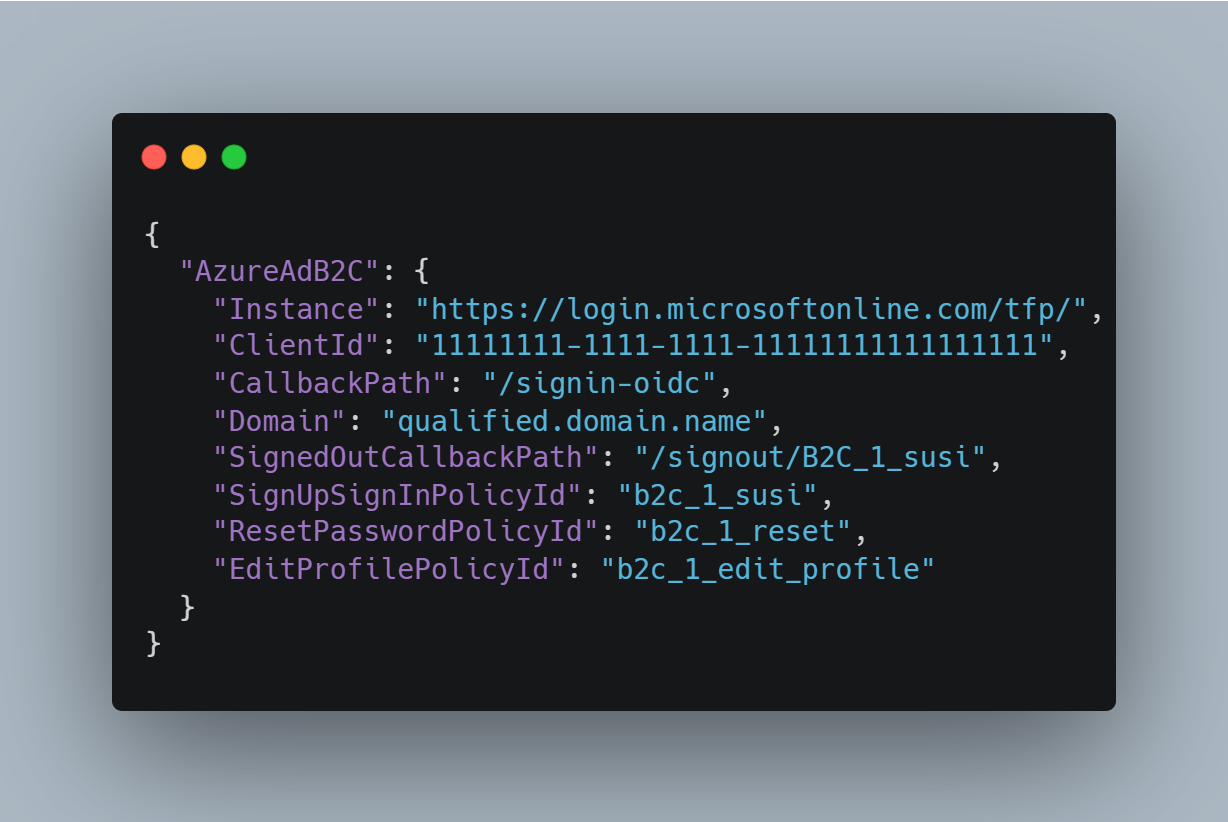
> The value for the Instance key that’s created with the template (https://login.microsoftonline.com/tfp/) is no longer working with AADB2C (at least not with Active Directories in Europe). If you get the error IOException IDX20807, unable to retrieve…, one reason is that the wrong link is specified (there can be other reasons as well). Configure this link with AADB2C instead: https://{yourdocomainname}.b2clogin.com.
Building the application created from the template, users can register and login – as soon as the configuration values are specified, which will be done after creating the application to the Azure service.
Azure AD B2C
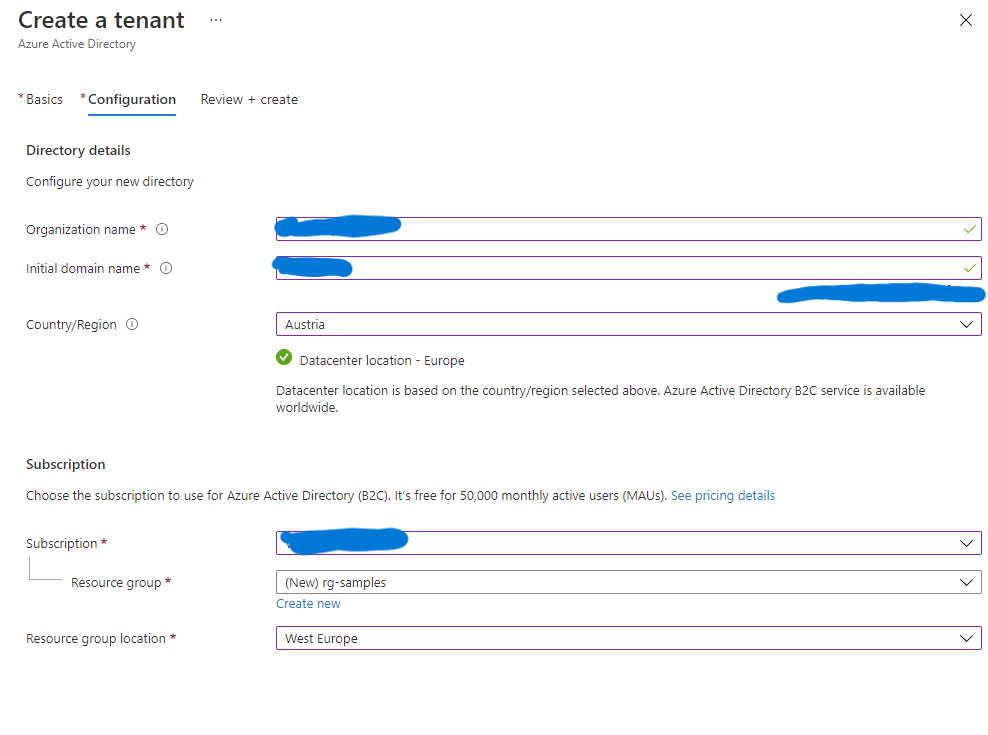
Using the Azure Portal, you can create a new Azure Active Directory B2C tenant – with a free tier of 50,000 monthly active users (MAU). Besides specifying the name of the organization and the domain name, you select the country or region where the user data should be stored. I selected Austria which gives me a data center located within Europe to fulfill the General Data Protection Regulation (GDPR) requirements.
With this directory, identity providers can be configured to allow users to take their existing account from providers such as Amazon, Facebook, GitHub, LinkedIn, and others as shown in the next image. Instead of remembering another password, users can bring their existing account.

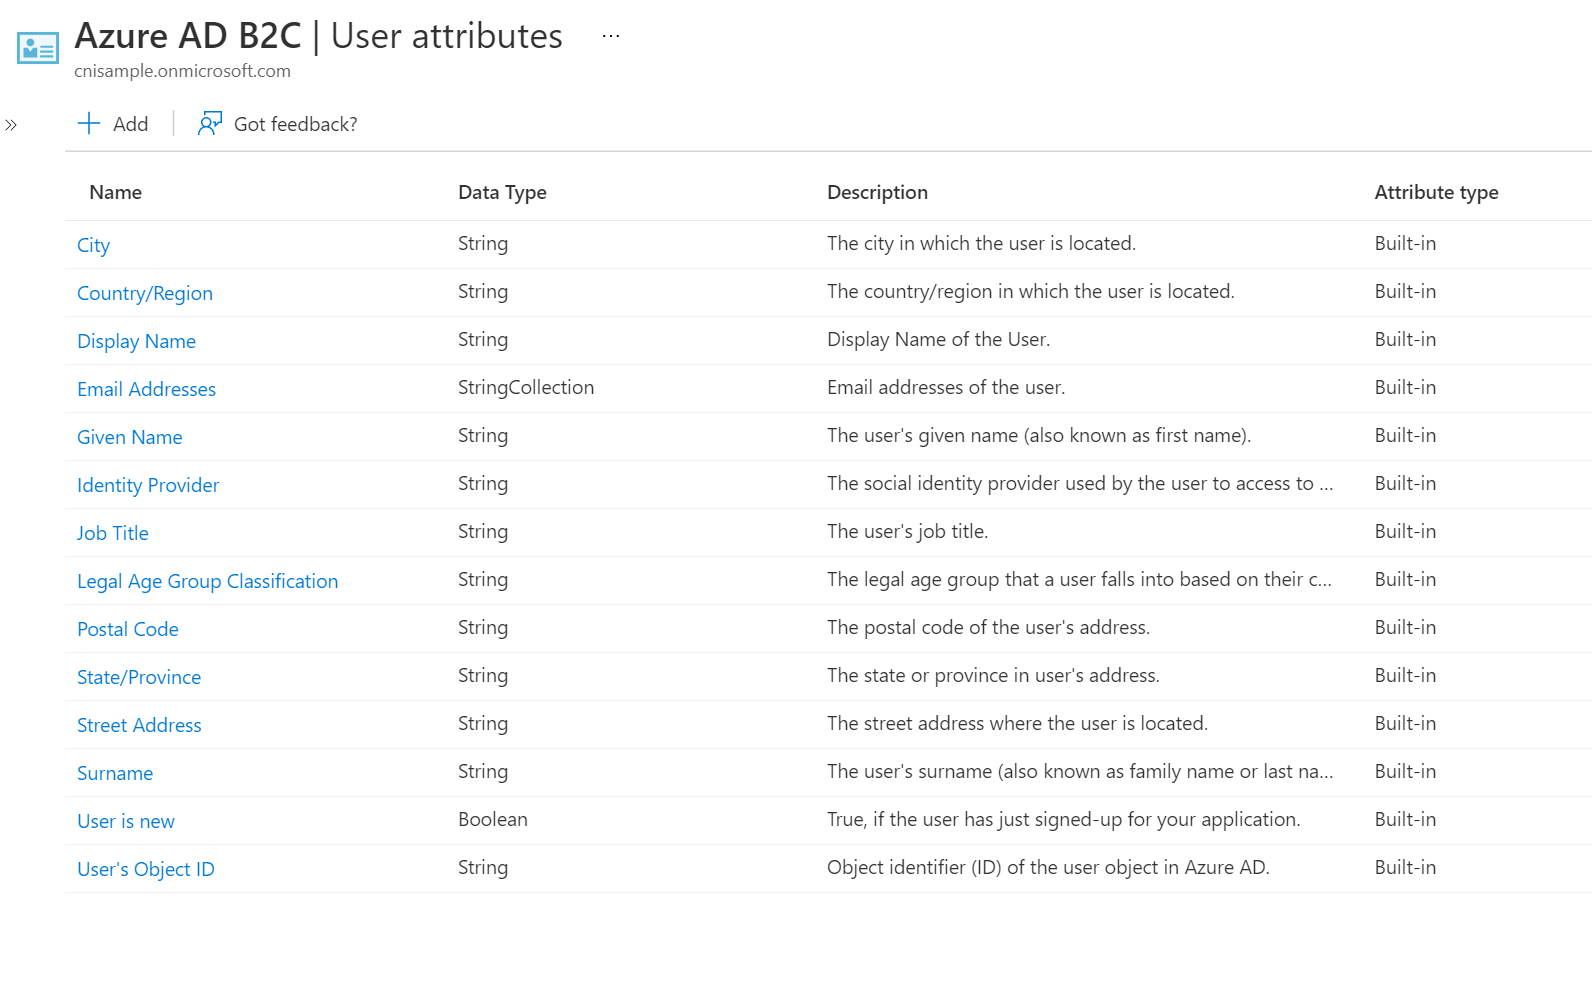
Using user attributes (shown in the next image) you can specify what information about the user should be stored with the directory. You can also create custom attributes. Using user flows, you can ask the user on registration (or when the user changes the profile) information that’s stored within the directory service. In case you use different identity providers, you don’t have access to all the user information stored with the identity provider. Instead, you need to ask the user for the information you’re interested, and can store this information with AADB2C.
Creating user flows, you can specify what information should be collected from the user, and what information should be passed within a token to the application. The flows configured with the application are flows to sign up and sign in, resetting the password, and editing the profile. Remember the names configured – these are needed with the application configuration.

With this configuration in place, you can test the user flow from the portal. The next image shows the sign up page of the sign up and sign in user flow.

User flows are customizable in many regards. You can specify the user attributes that should be part of the form – including custom attributes. You can create a fully customized page that’s served from your application, add API connectors that are invoked from the flow (e.g. after federating with an identity provider, before creating the user, before including application claims in tokens), and you can also create custom policies.
To map the web application created to the Azure Active Directory B2C, with the directory an application needs to be registered. With a web application, the Redirect URI needs to be specified. To test the application locally using the directory, configure the https://localhost address including the port number and the signin-oidc path used by the application.
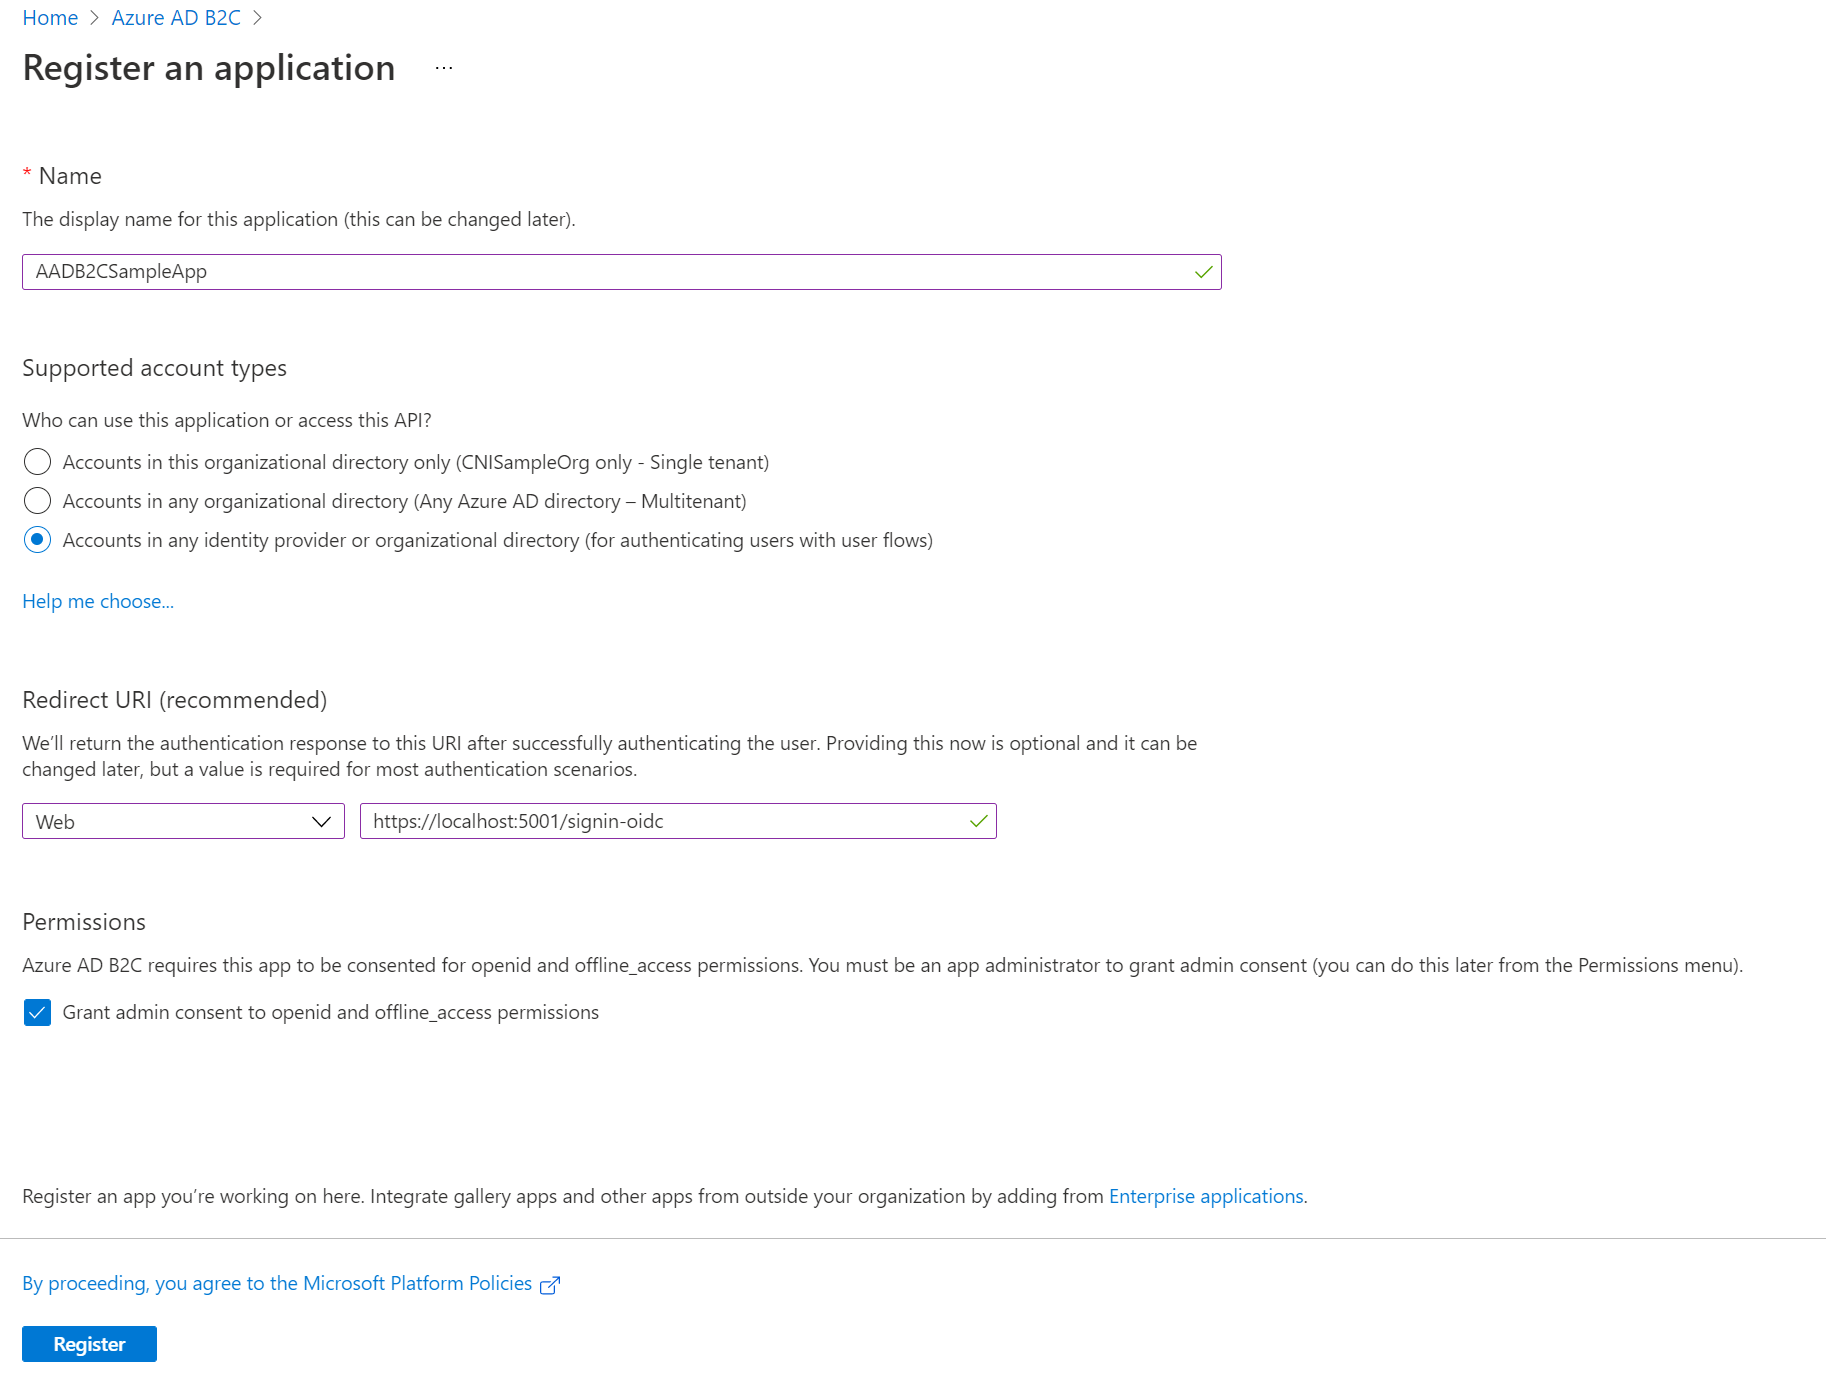
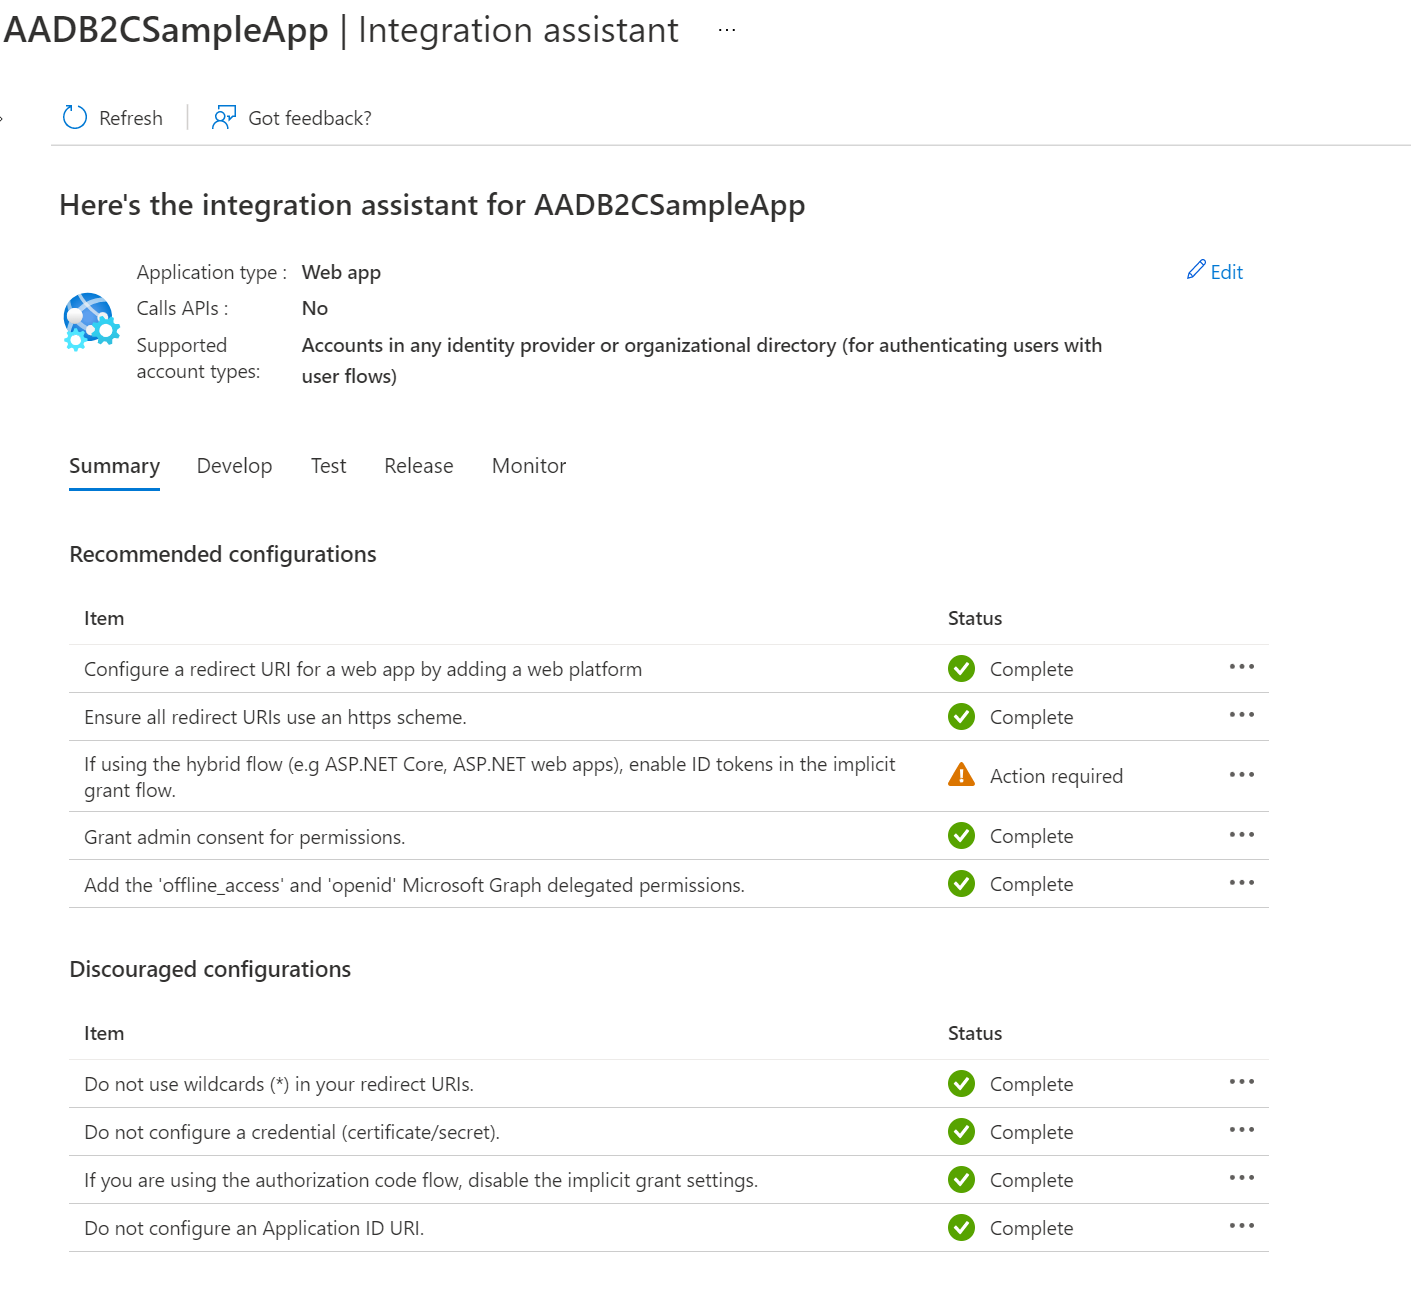
With the default ASP.NET Core configuration, implicit flows need to be configured as well. You find this configuration with the Authentication section of the application configuration. For help with the configuration of applications, you can also use the Integration assistant, select the application type, and evaluate the app registration. This assistant gives hints – such as the implicit flow – that need to be configured. This assistant offers links to documentation and tutorials as well.
To register an application with the AADB2C, and to update the configuration in the application, you can use the NET tools Microsoft.dotnet-msidentity or msidentity-app-sync. See the links below.
Configuring the Application
After the application is configured with the AADB2C, you can put all the different configuration values to the application configuration within appsettings.json.
Here is a list of the configuration settings for the AzureAdB2C section:
- Instance – use https://{yourdomain}.b2clogin.com
- ClientId – use the Application (client) Id found with the Overview settings of the app registration
- CallbackPath – leave it with
/signin-oidc– this needs to be configured with AADB2C - Domain – use the domain you registered
- SignedOutCallbackPath – you can configure the path specified here with AADB2C for a signout
- SignUpSignInPolicyId – configure the name you specified for the sign up and sign in user flow
- ResetPasswordPolicyId – configure the name you specified for the password reset user flow
- EditProfilePolicyId – configure the name you specified for the profile editing user flow
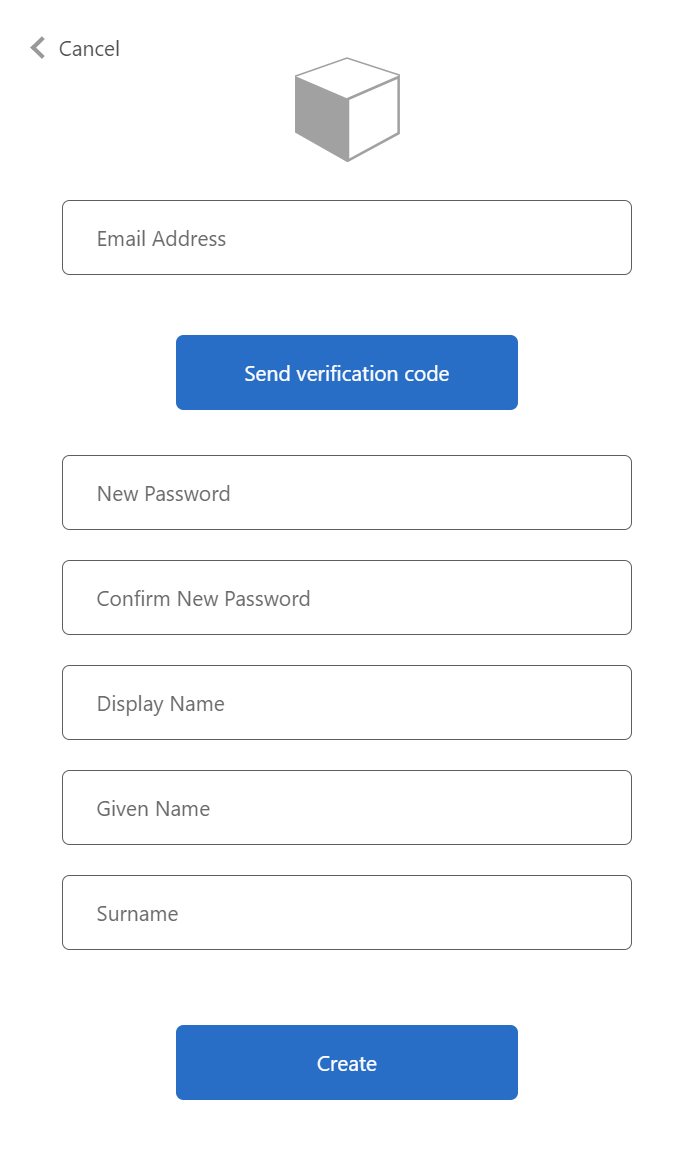
After the configuration is in place, you can start the application. Clicking on the Sign In link, you have the option to sign in, or click on the Sign up now link. This opens the dialog shown below. All the fields defined with the specific user flow are shown. Using the email provider, verification of the email address is already built-in with AADB2C.
Take away
The Azure Active Directory B2C is a powerful service that you can use in Web applications where your users should be allowed to register. Instead of creating a custom implementation, or using an on-premises service, AADB2C offers many features which allow for customizations. Using .NET, templates are available which make it easy to use Microsoft Azure services.
Enjoy learning and programming!
Christian
It would be great if you show support buying a coffee.

More Information
More information about the .NET Core configuration is available in my new book and my workshops.
Professional C# and .NET – 2021 Edition
See Chapter 20, "Security" for more information about the Microsoft Identity platform. See Chapters 24 to 28 for more information on ASP.NET Core.
Related Information
Microsoft.dotnet-msidentity .NET tool package
dotnet-msidentity Source Code Repo
msidentity-app-sync .NET tool package
msidentity-app-sync Source Code Repo
Set up a sign-up and sign-in flow in Azure Active Directory B2C
Customize the user interface in Azure Active Directory B2C
ID 160295748 © Denisismagilov | Dreamstime.com Typing on laptop ID 160295748 © Denisismagilov | Dreamstime.com

2 thoughts on “Using Azure Active Directory B2C with .NET”