
It’s great what’s built-in out of the box with Azure Active Directory and ASP.NET Core. I need a B2C directory where users can register, add some additional information, and use this account with a native app calling an API service. First, let’s start defining the Active Directory B2C and creating the ASP.NET Core Web app where users can register and manage their profile.
50.000 users with 50.000 authentications a month is free with Azure AD.

Create the Active Directory B2C
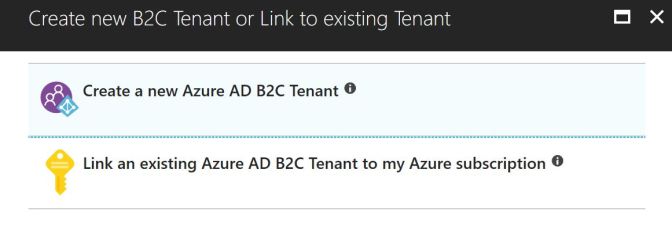
In the Azure Portal, clicking on the Create button to create an Azure Active Directory B2C, you have two options – and you need both of them, one after the other. First, you need to create an Azure AD B2C Tenant, and then link this tenant to one of your Azure subscriptions.
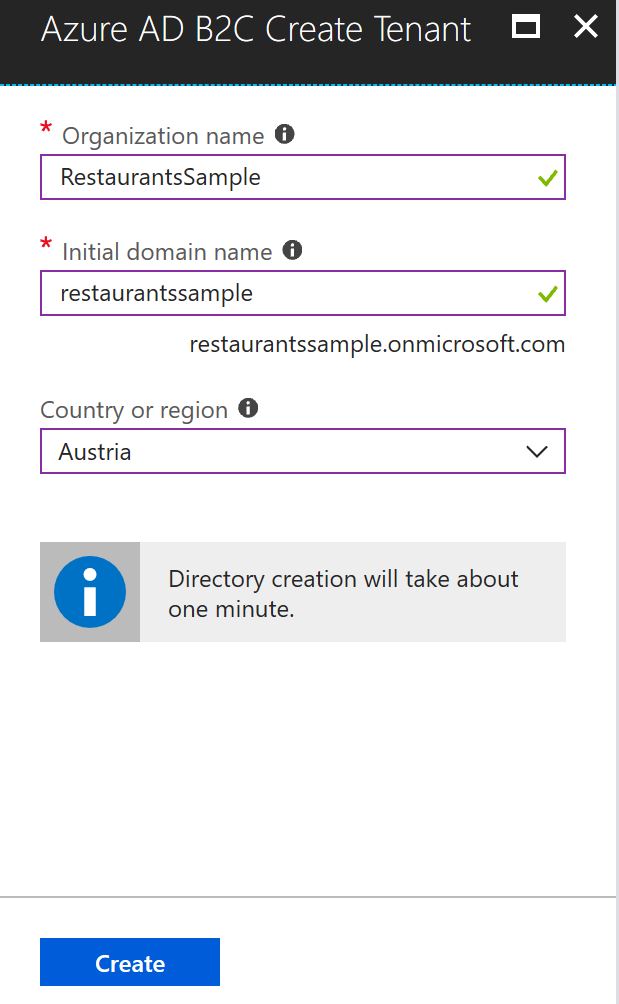
Next, you need to configure the AD, defining the organization, domain name, and the country. The country or region where you store your users is important for GDPR requirements.
Identity Providers
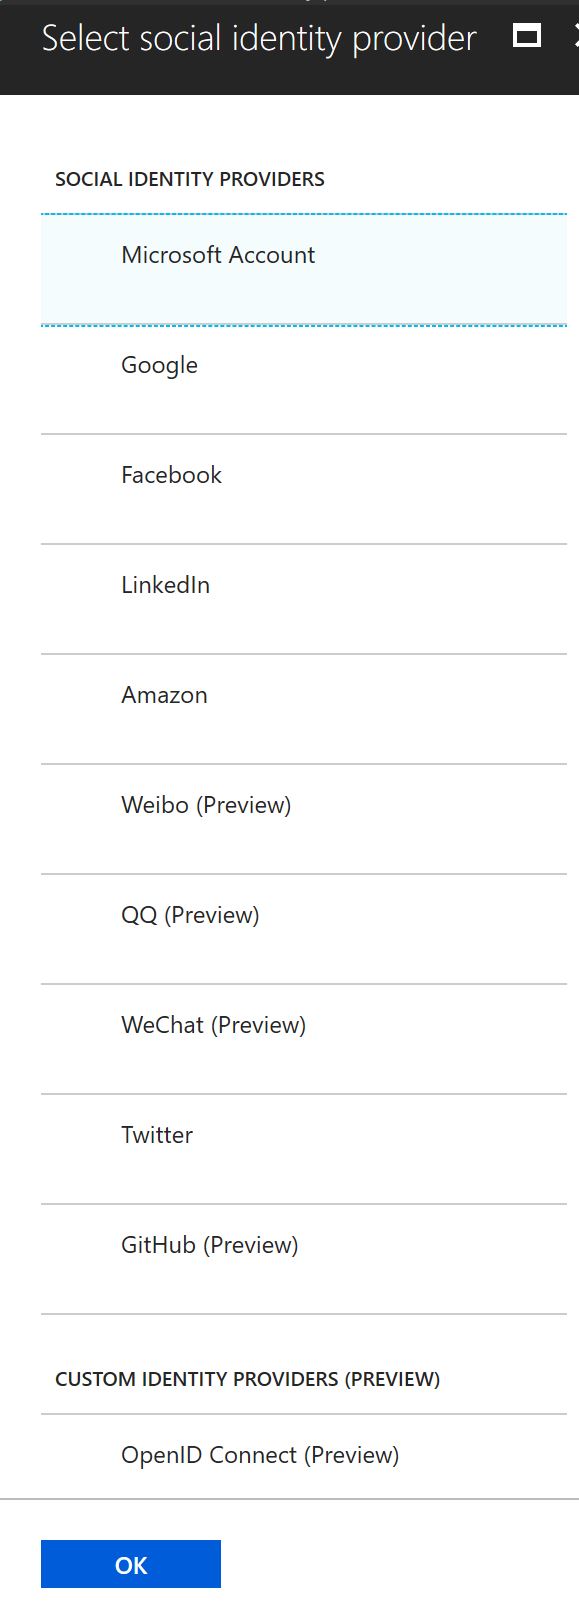
With Azure AD B2C, you don’t need to store passwords from the users in the Azure AD. You can use the AD to store additional information you need from the user. Selecting the menu Identity Providers, you can chose from a wide range of identity providers covering Microsoft Account, Google, Facebook, LinkedIn, Amazon, and many more – including a custom identity provider with OpenID Connect support.
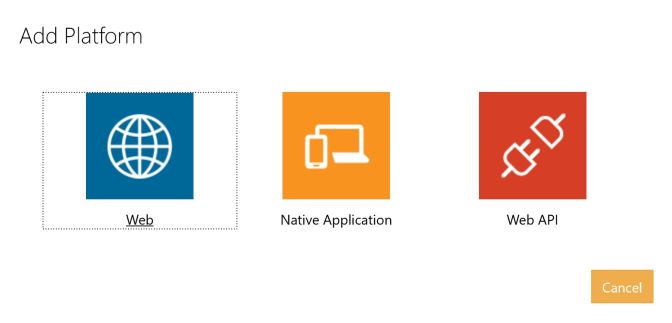
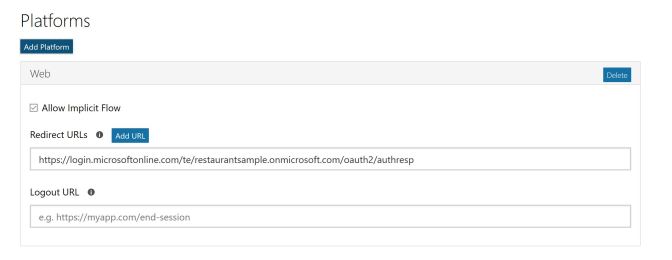
I’m selecting – in addition to the e-mail identity provider – the Microsoft Account identity provider. For this provider you can get application ids and secrets from the Application Registration Portal. For the Azure Active Directory B2C configuration you need the application id, and also a generated password. These need to be added to the configuration of the Identity Provider in the Azure portal. In addition to that, for using a Website to make this logon, with the Application Registration Portal you need to add a platform for the application. Adding a platform, Web, Native Application, and Web API are offered.
Adding the Web Platform, the redirect URL https://login.microsoftonline.com/te/{tenant}/oauth2/authresp needs to be configured whereas the tenant needs to be replaced by the tenant link, e.g. restaurantsample.microsoftonline.com.
Extra Information from the User
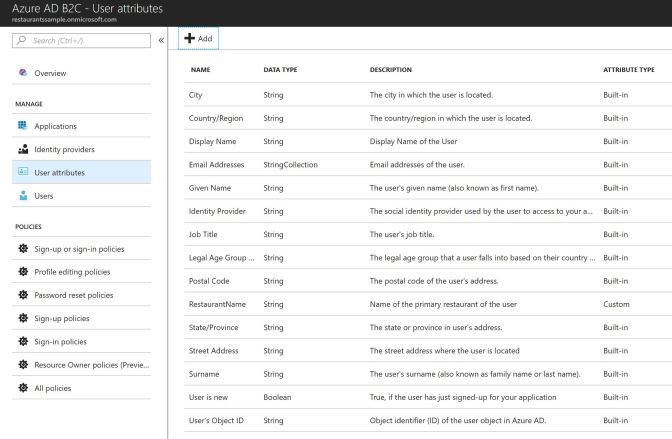
After configuring the identity providers in the Azure Portal, let’s move on to the users. If you need some information from the user in addition to name, email, address…, you can add extra user attributes. These must be of type String, Boolean, or Int. Opening the Azure B2C configuration, you just need to click on User Attributes, and add the attributes as needed.

The following figure shows the list of all the built-in attributes in addition to the just created custom attribute RestaurantName.
Define Policies
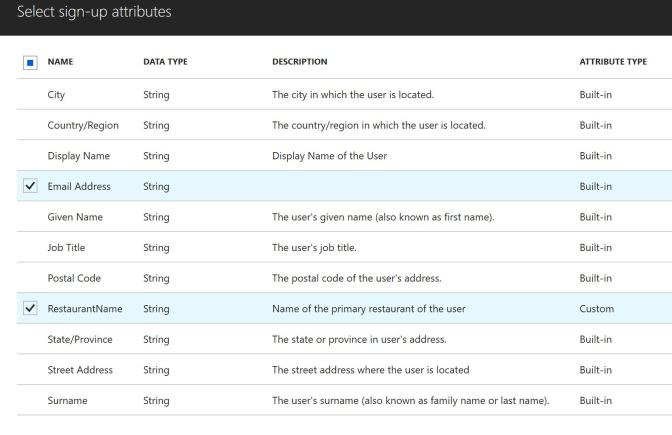
With all the attributes in place that you need, you can now define policies. From the Azure Portal, you can create new policies. Creating a new Sign Up or Sign In Policy, you can configure identity providers that should use this policy, sign-up attributes that the user needs to enter on signing up, application claims that are sent to the application via tokens, and also can configure multi-factor authentication, and define a custom user interface. In the following image, just the email and restaurant names are requested from the user.
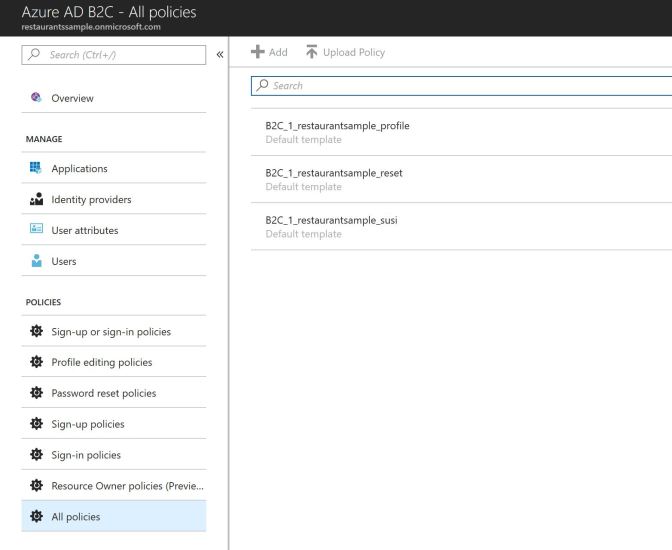
Be aware that the name you enter for the policy is prefixed in the portal with the prefix
B2C_1_. If you name the sign up or sign in policy restaurantsample_susi, the full name of the policy is B2C_1_restaurantsample_susi.
You need to have at least policies for sign up or sign in and password reset. The policy profile editing is optional – this allows the user to update his profile. The password reset policy can only be used with passwords stored within the Active Directory.
Selecting All Policies, you can see the list of all created policies.
ASP.NET Core Web Application
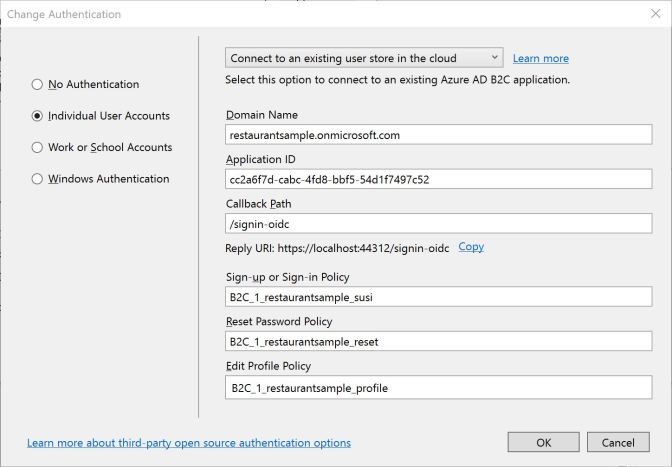
With the configuration of the Active Directory B2C in place, you can create the ASP.NET Core Web application. I’m creating an ASP.NET Core 2.1 Web Application using Razor Pages. Before creating the application, the authentication is changed to Individual User Accounts, with the selection Connect to an existing user store in the cloud. This selection needs a configuration for
- the domain name ({tenant}.onmicrosoft.com)
- the application id (take this from the Azure Portal)
- sign-up or sign-in policy
- reset password policy
- edit profile policy
Supplying the edit profile policy is optional.
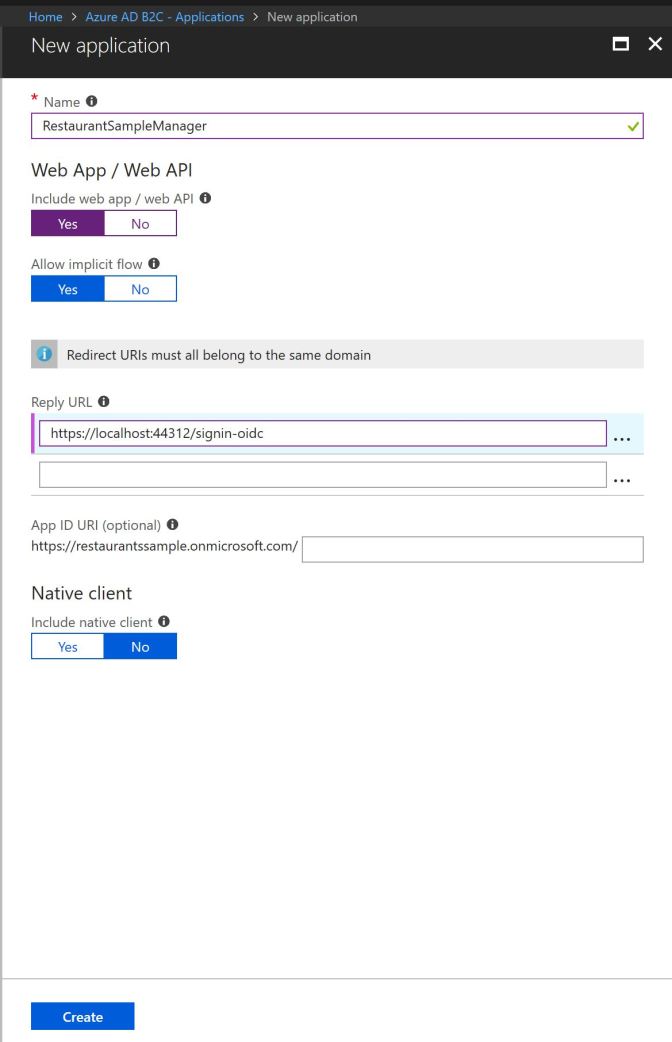
With the configuration you need the application id. This application id can be taken from the Application configuration in the portal. In case you didn’t create an application yet, do it now, and get the application id from there. The configuration for the reply URL can be copied from visual Studio while changing the configuration. In case you created an application in the Azure AD B2C configuration earlier, update the Reply URL.
The Startup class of the application contains the authentication configuration for AD B2C:
This file contains bidirectional Unicode text that may be interpreted or compiled differently than what appears below. To review, open the file in an editor that reveals hidden Unicode characters.
Learn more about bidirectional Unicode characters
| public void ConfigureServices(IServiceCollection services) | |
| { | |
| services.Configure<CookiePolicyOptions>(options => | |
| { | |
| // This lambda determines whether user consent for non-essential cookies is needed for a given request. | |
| options.CheckConsentNeeded = context => true; | |
| options.MinimumSameSitePolicy = SameSiteMode.None; | |
| }); | |
| services.AddAuthentication(AzureADB2CDefaults.AuthenticationScheme) | |
| .AddAzureADB2C(options => Configuration.Bind("AzureAdB2C", options)); | |
| services.AddMvc().SetCompatibilityVersion(CompatibilityVersion.Version_2_1); | |
| } |
The configuration for the Azure AD B2C domain is retrieved from the JSON configuration file:
This file contains bidirectional Unicode text that may be interpreted or compiled differently than what appears below. To review, open the file in an editor that reveals hidden Unicode characters.
Learn more about bidirectional Unicode characters
| { | |
| "AzureAdB2C": { | |
| "Instance": "https://login.microsoftonline.com/tfp/", | |
| "ClientId": "cc2a6f7d-cabc-4fd8-bbf5-54d1f7497c52", | |
| "CallbackPath": "/signin-oidc", | |
| "Domain": "restaurantsample.onmicrosoft.com", | |
| "SignUpSignInPolicyId": "B2C_1_restaurantsample_susi", | |
| "ResetPasswordPolicyId": "B2C_1_restaurantsample_reset", | |
| "EditProfilePolicyId": "B2C_1_restaurantsample_profile" | |
| }, | |
| "Logging": { | |
| "LogLevel": { | |
| "Default": "Warning" | |
| } | |
| }, | |
| "AllowedHosts": "*" | |
| } |
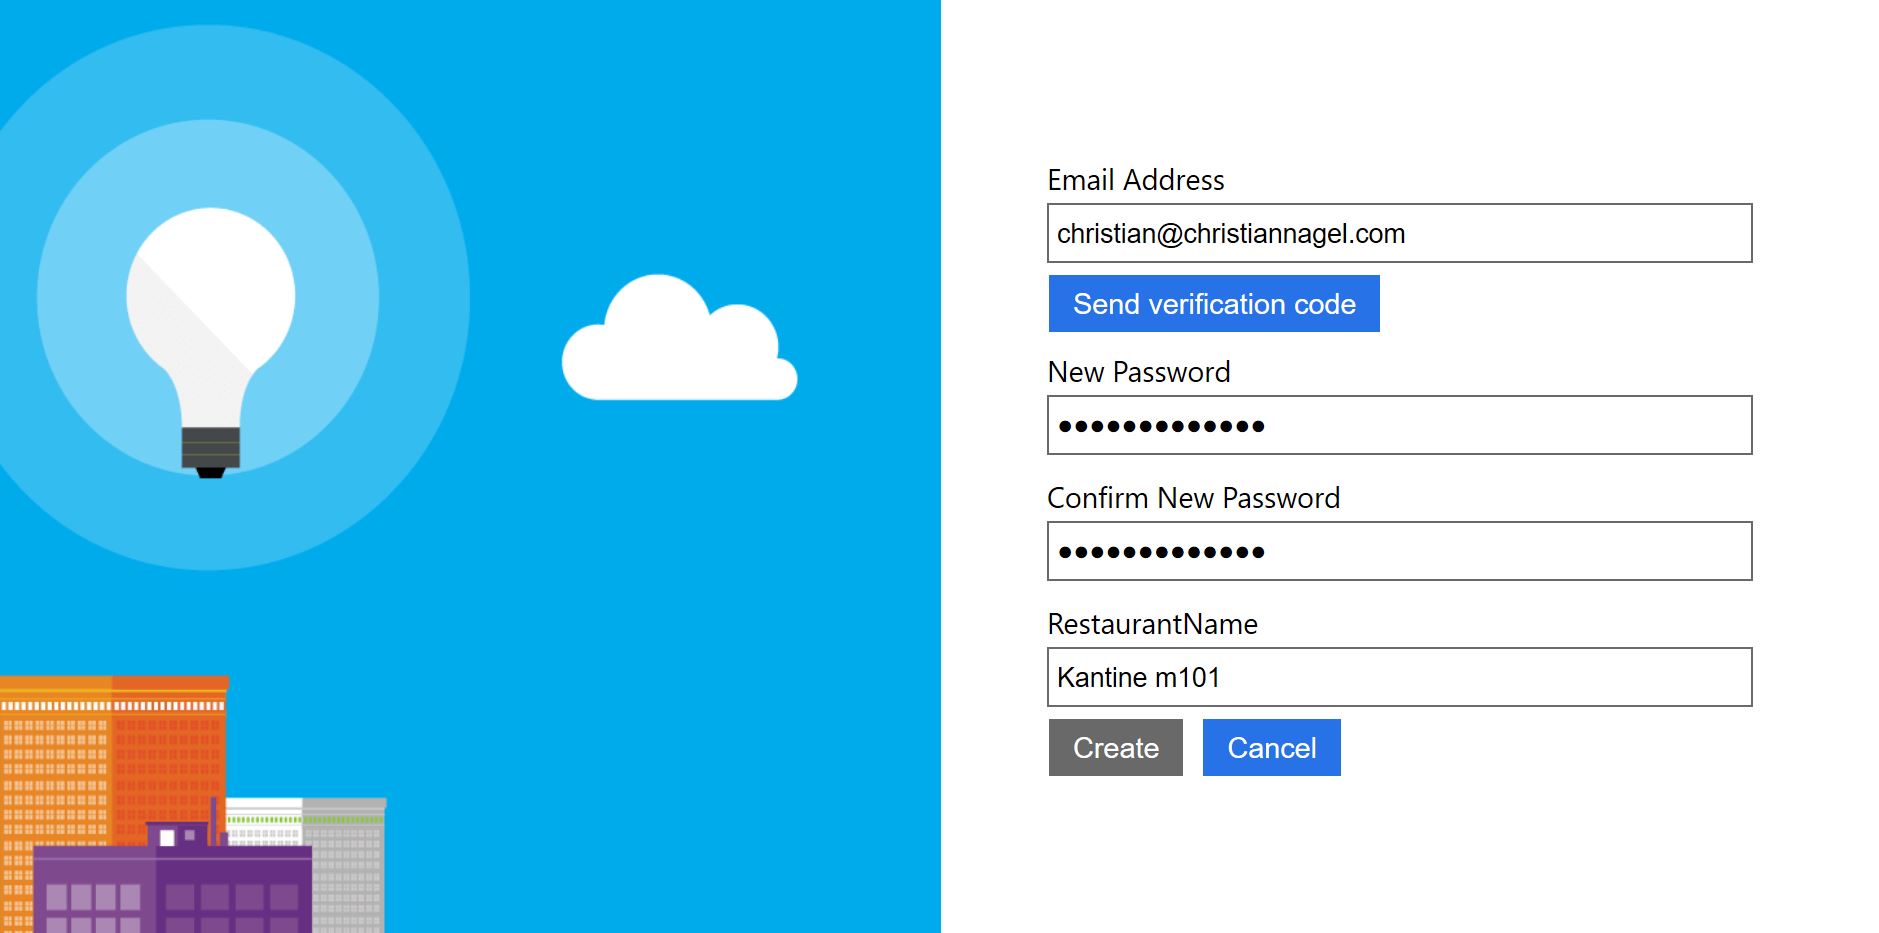
Running the application, user registration is now working out of the box. Enter user information as defined by the policy – including the name of the restaurant. Support to send verification code for the email is built-in with ASP.NET Core 2.1 as well.
The user can enter information to his profile as defined by the profile policy. Here, the profile policy asks for the given name and the country.

Summary
With Azure Active Directory B2C you gain infrastructure functionality for the application that you no longer need to build custom, just use it out of the box. Storing user information in a secure way either stored in the Active Directory, or making use of different identity providers. ASP.NET Core offers great integration functionality to Azure Active Directory.
If you found this information valuable and want to help me writing more articles, please buy me a coffee. Coffee helps with writing 🙂

More information on ASP.NET Core is in my book Professional C# 7 and .NET Core 2.0, and in my ASP.NET Core trainings.
Enjoy learning and programming!
Christian

Is there going to be a way to set up an AAD B2C, or configure reply URLs for an existing B2C, using powershell or ARM templates? Currently you have to use the portal UI, which causes problems when you try to integrate it into an automatic deployment pipeline. We’re even considering driving the portal with selenium webdriver, which can’t be right.
LikeLiked by 1 person
Andy, I’m not aware of PowerShell or ARM template plans for AAD B2C. While AAD is so much different to other Azure resources, programmatically creating B2C can be really useful.
LikeLike
how can i pass the ui_locales parameter ?
LikeLike
Thanx for posting this! I was having a lot of trouble getting an “official” MS example, from github, to work, probably because it was out of date with where AspNet Core 2.1 is. I appreciated you walking through all the steps in a clear manner.
LikeLiked by 1 person
Mark, thanks for your comment 🙂
It’s good to know how helpful the information is. Thanks!
LikeLike
You’re welcome, Christian.
BTW, after being relieved at finally getting the login page to finally appear, I ran into some subsequent issues:
– no signup/login option using a email (i.e., the local email account option) appears, despite it being one of the identity providers for the tenant
– the Google sign up fails with an “invalid redirect_uri” error, even though it’s configured per the instructions at https://docs.microsoft.com/en-us/azure/active-directory-b2c/active-directory-b2c-setup-goog-app
– the Microsoft Account sign up fails with a “we’re experiencing technical difficulties” error…that’s persisted for over 24 hours 🙂
Any thoughts on what might be causing these errors? It sounds like I’ve misconfigured something in either the tenant or the site.
LikeLike
Christian,
Could you please guide me how to implement Azure B2C for ASP.NET Core Web API 2.1 ?
LikeLiked by 1 person
Alex, thanks for asking. I already have a UWP app accessing ASP.NET Core Web API, and using Azure B2C in production – but it will take some time to write about it. I will make an article describing how this can be done – but not before the Basta! conference in Germany end of September.
LikeLike